Installation and setup
Let’s get Bricks installed on your WordPress site.
Before you install, confirm your host meets Bricks requirements (PHP, database, memory, upload size, and a modern browser). Most hosting does; use that article if you need to raise limits or troubleshoot.
Install the Bricks theme
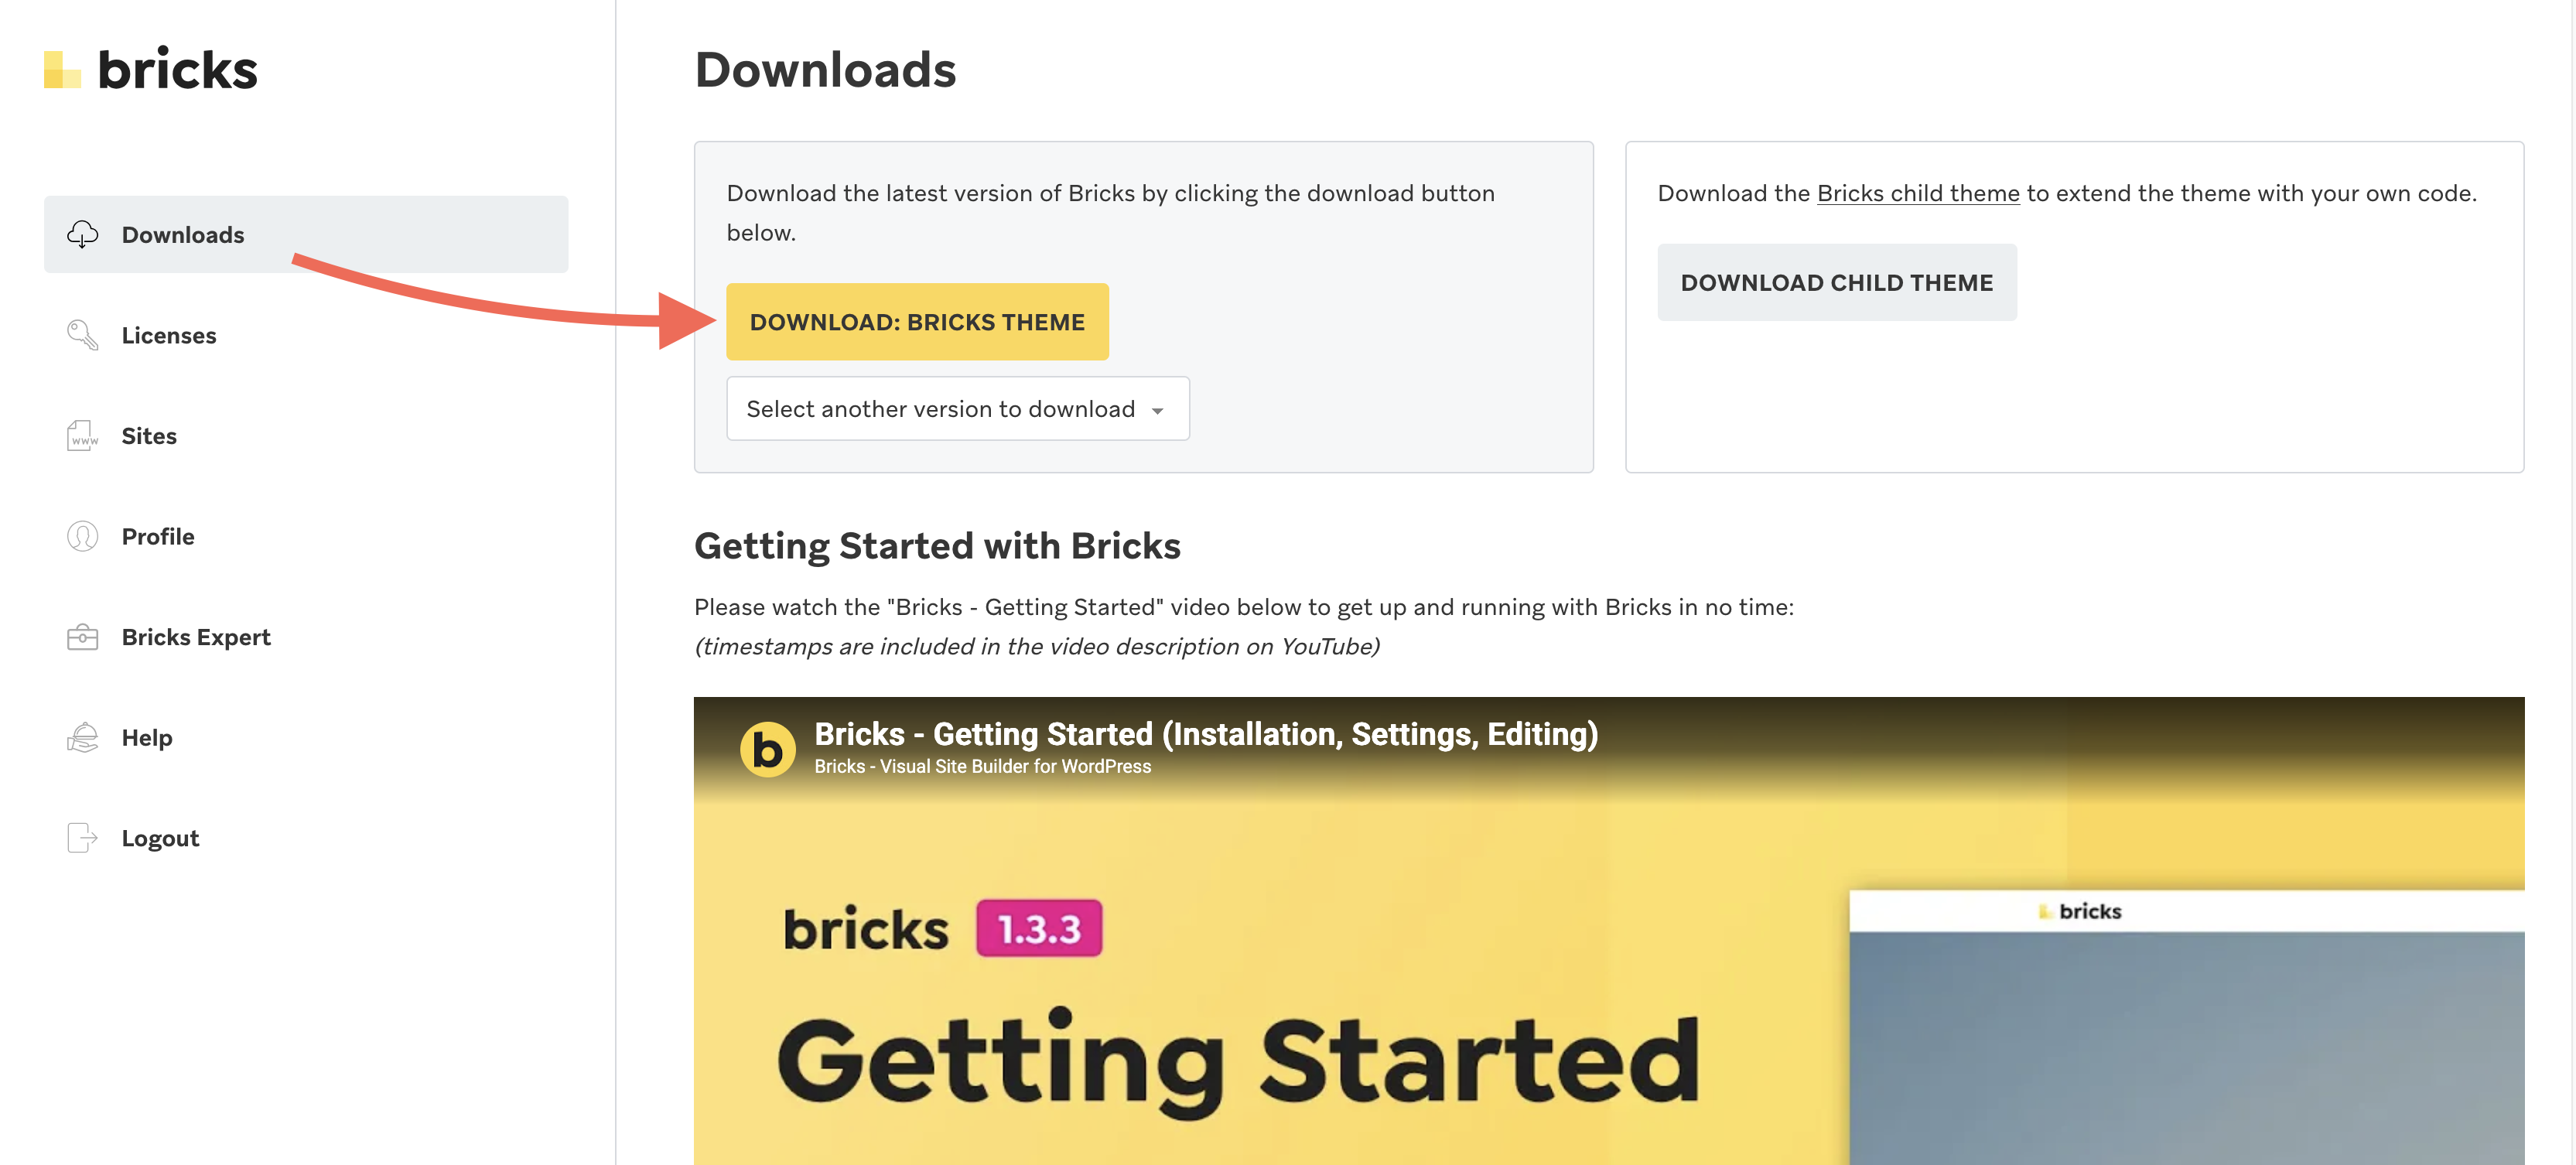
Section titled “Install the Bricks theme”Installing Bricks works exactly like any other WordPress theme. Use one place for everything account-related: my.bricksbuilder.io (download the theme ZIP and find your license key there).
Download Bricks
Section titled “Download Bricks”Log into my.bricksbuilder.io and download the latest version as a ZIP file.
Upload to WordPress
Section titled “Upload to WordPress”- In your WordPress dashboard, go to Appearance > Themes
- Click Add New
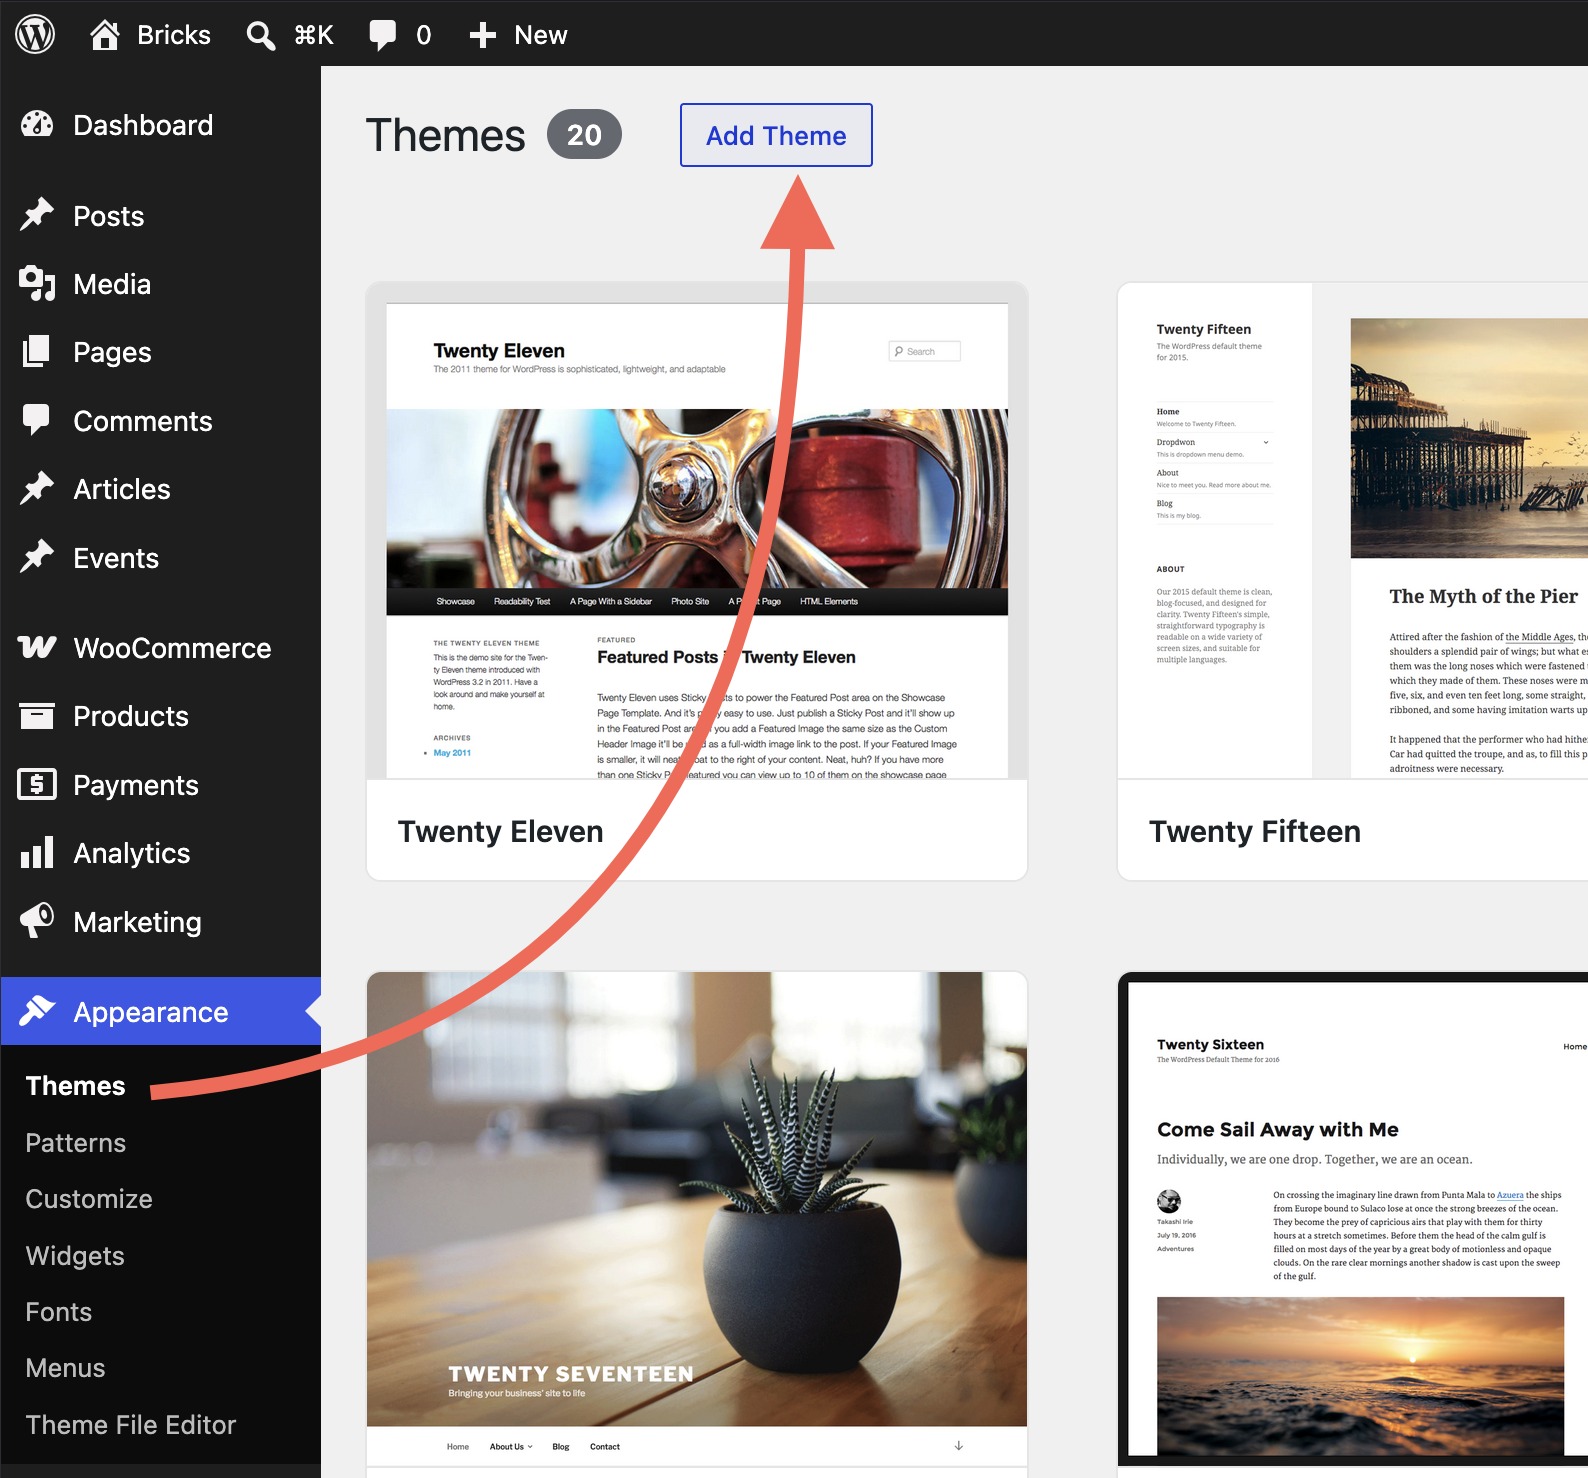
- Click Upload Theme

- Select the
bricks.zipfile from your computer - Click Install Now
- After the upload completes, click Activate (or go to Appearance > Themes and activate Bricks)
If the upload fails, it is usually because your WordPress site does not allow large enough uploads. See Requirements (max file upload size) or, as a last resort, unzip the file on your computer and upload the bricks folder via FTP to /wp-content/themes/.
Activate your license
Section titled “Activate your license”Once Bricks is installed, you’ll see a new Bricks menu item in your WordPress dashboard, along with a notification prompting you to activate your license.
Click Bricks > License (or the notification link). This opens the license activation screen.

Steps to activate
Section titled “Steps to activate”- Copy your license key from my.bricksbuilder.io
- Paste it into the license field
- Click Activate License
You should see a confirmation that your license is active.
That’s it, Bricks is ready to use!
For license limits, staging URLs, managing activations, automatic updates, and updating safely, see License, updates, and your account.
What you’ve accomplished
Section titled “What you’ve accomplished”You now have Bricks installed and licensed.
Was this helpful?
A quick vote and short notes help us improve these docs faster.
Leave a note for us
Please do not include passwords, license keys, or personal data. We store submitted notes to improve the docs.
Thanks for sharing feedback. We're using it to improve these docs.