Building a header template
Let’s build a global header with a logo and menu.
Create the template
Section titled “Create the template”- Go to Bricks > Templates
- Add New: “Header”
- Edit with Bricks
Settings
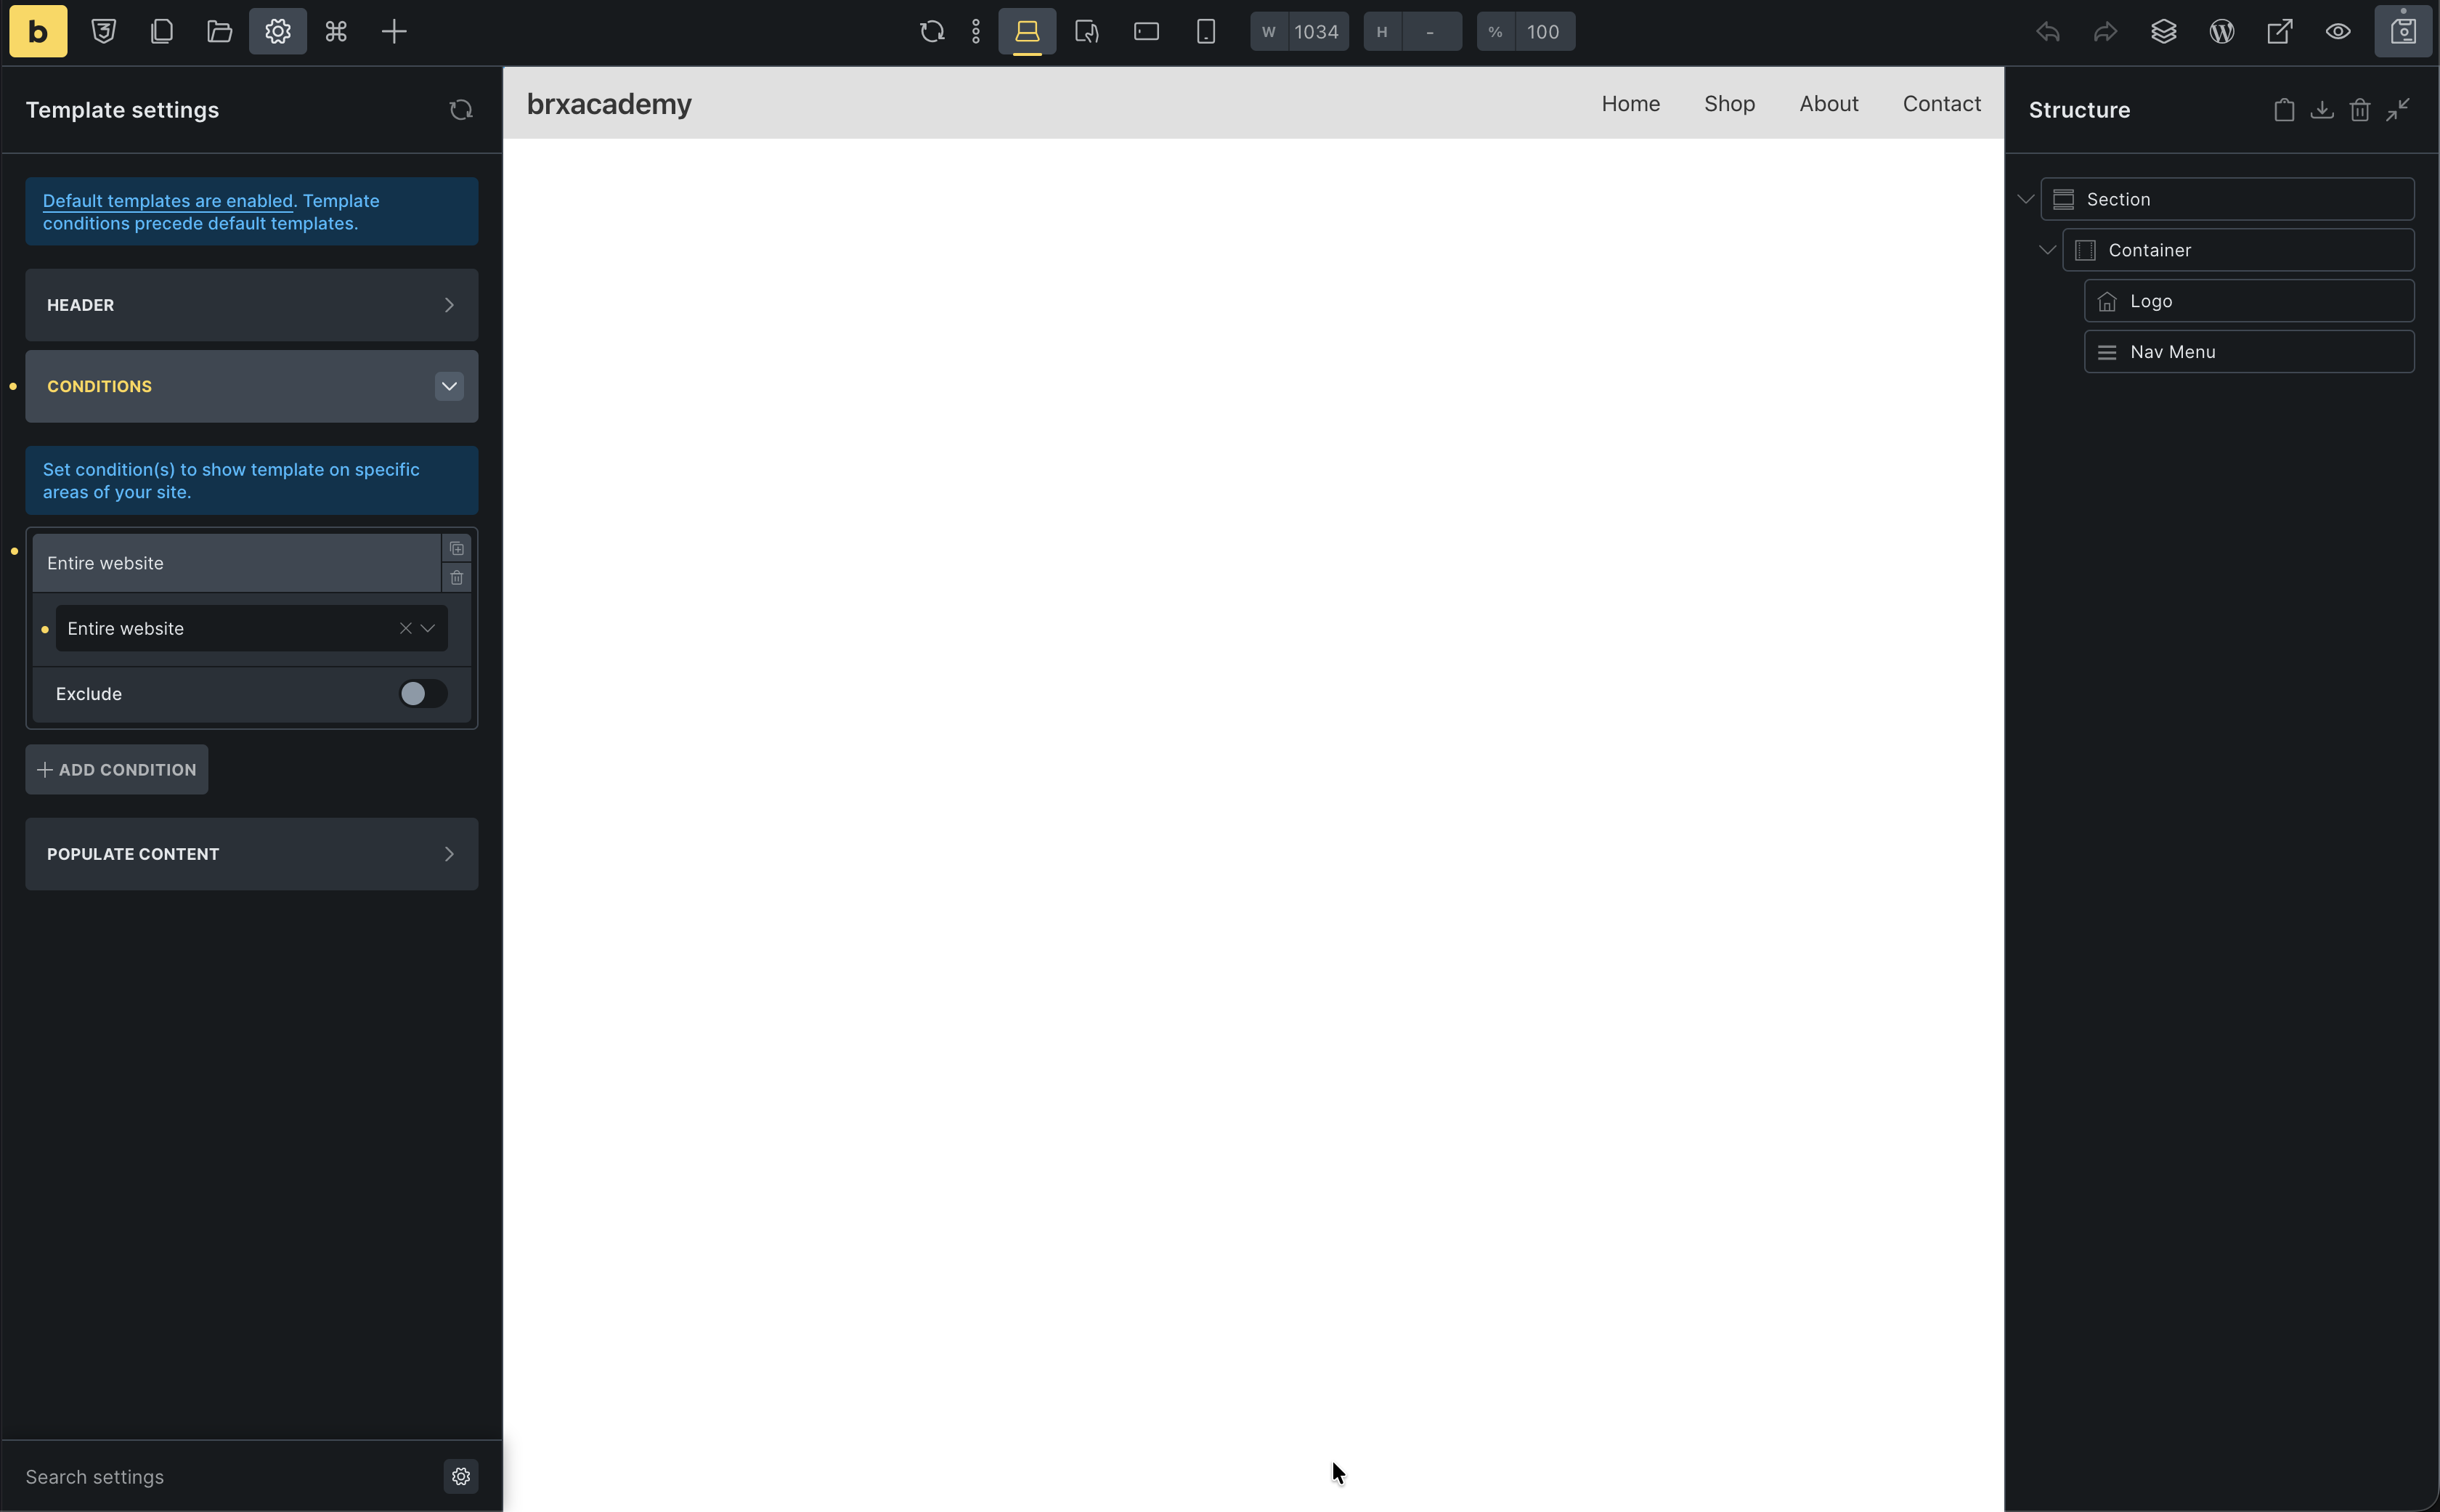
Section titled “Settings”- Settings (gear) > Template Settings
- Type: Header
- Conditions: Entire Website
Build the structure
Section titled “Build the structure”- Add a Section
- Inside the Container:
- Add a Logo element (or Image/Text)
- Add a Nav Menu element (we’ll use the standard WordPress menu)
Style the layout
Section titled “Style the layout”Container:
- Direction:
Row(horizontal) - Justify content:
Space between(pushes logo and menu apart) - Align items:
Center(vertically aligned)
Section:
- Background color: Pick a light gray or your brand color
- Padding:
12top/bottom (this intentionally overrides our global 80px for this specific section)
Your header is part of the site chrome, not page content. It usually needs tighter spacing than regular sections, so it is a good place to make a deliberate exception to your global section padding.
Create a WordPress menu (if you do not have one yet)
Section titled “Create a WordPress menu (if you do not have one yet)”The Nav Menu element uses a normal WordPress menu. If Appearance > Menus is empty or you have never built a menu:
- From the WordPress dashboard, go to Appearance > Menus
- Enter a Menu name (for example
Main) and click Create Menu - Add a few items from the left (Pages, Custom links, and so on), then click Save Menu
Then return to this template in the builder.
Configure the menu
Section titled “Configure the menu”- Select the Nav Menu element
- Under Menu, choose the WordPress menu you created (for example Main)
Save and verify
Section titled “Save and verify”- Save the template
- Go to your Pages panel (top bar) -> Home
- You should see your new header sitting perfectly atop your hero section!
Was this helpful?
A quick vote and short notes help us improve these docs faster.
Leave a note for us
Please do not include passwords, license keys, or personal data. We store submitted notes to improve the docs.
Thanks for sharing feedback. We're using it to improve these docs.